Planning to Study Abroad? Register Now & Get a Call from Us.
The Graduate Record Examinations (GRE) is owned and managed by the Educational Testing Service (ETS). According to ETS, the GRE targets to evaluate, quantitative reasoning, verbal reasoning, analytical writing, and critical thinking ability that have been obtained over a long period of learning.
The registration procedure may seem a bit complicated, but once you understand the steps, it will become easy for you. This article will guide you throughout the GRE registration process.

Before registration for GRE go through some important points from the links given below related to your GRE test:
| GRE syllabus | GRE exam pattern |
| GRE exam dates | GRE score |
GRE Registration Instructions
Candidates can register for GRE online itself. But before the GRE registration, the applicant must follow the instructions mentioned below:
- One must follow the health need procedure given by ETS if he/she have any health-related issues.
- Take proper time to select your test center and time for GRE score reporting to meet the admission deadlines.
- Applicants must bring valid and acceptable identification proof at the test center.
- Remember the spelling of your name and other important things must be filled in correctly during the GRE registration process
- Make sure that your Identification documents match the name of your account.
If you have any doubt regarding the exam, you will get your answers here: Frequently Asked Questions of GRE
ID requirements for GRE registration
While signing up with the ETS account candidate is required to submit any valid Identification proof for the name used in the account. General guidelines about Identification requirements are as follows:
- Photocopies of the document will not be allowed, it must be an original document.
- The documents must be in the validity period, expired documents will not be accepted.
- It must contain the full name of the candidate in the documents It must be government-issued identity proof.
- The photograph of the candidate on the document must be clear and visible.
- The document must also have the applicant’s signature.
Do not repeat these mistakes: 6 Common mistakes made by GRE test-takers
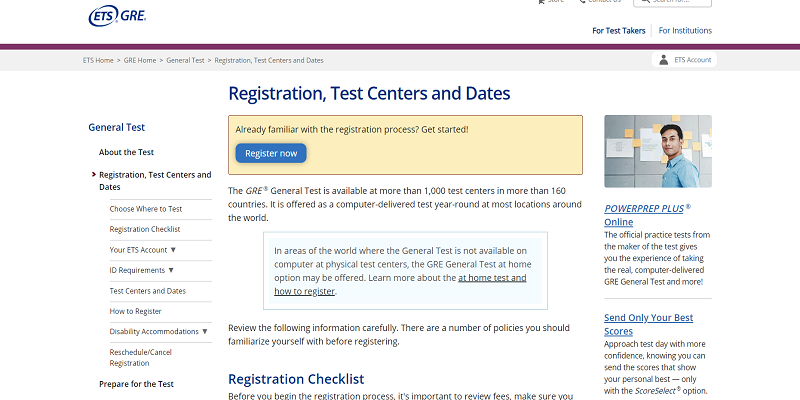
GRE Registration
1. Go to the GRE registration Website. You will find a page below. Click on Register Now
2. Being a new test taker, you need to create an account first. So click on the option “create an account”

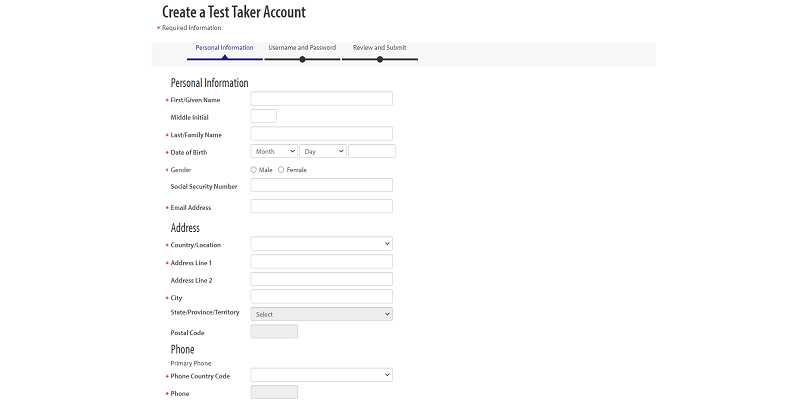
3. You will be directed to a page where you will be asked to fill in your personal information like Name, date of birth, gender, email-id, address, etc. Fill in all the details correctly and click on the option “NEXT”
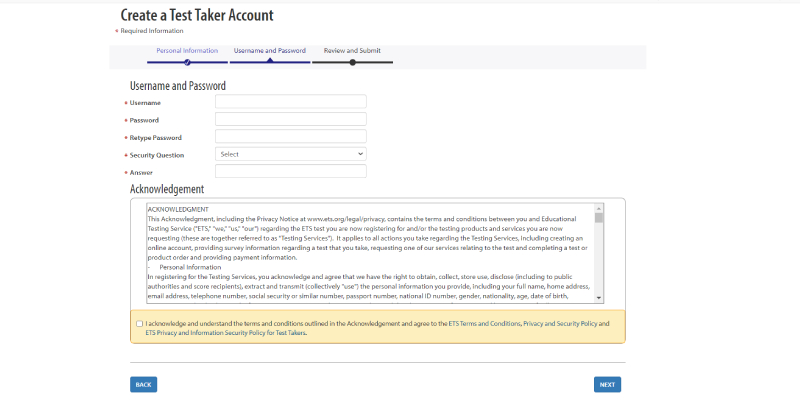
4. In the next step you need to create your username and password. You will also be asked a security question for safety purposes. After filling click on next.
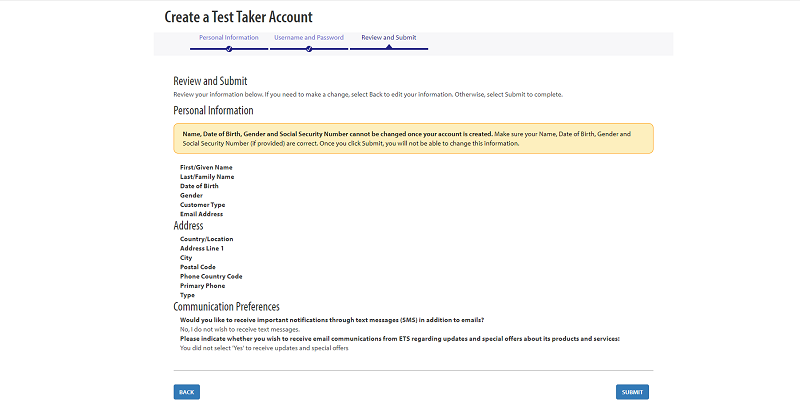
5. In the next step, you need to check all the details you have entered and click on submit. Your account will be created.
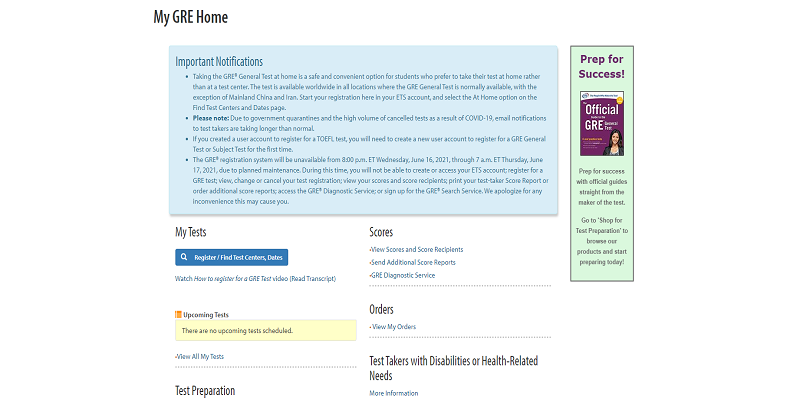
6. After creating the account, sign in with your email ID and password. You will be directed to the page as below. Click on “Register/find test centers, date”
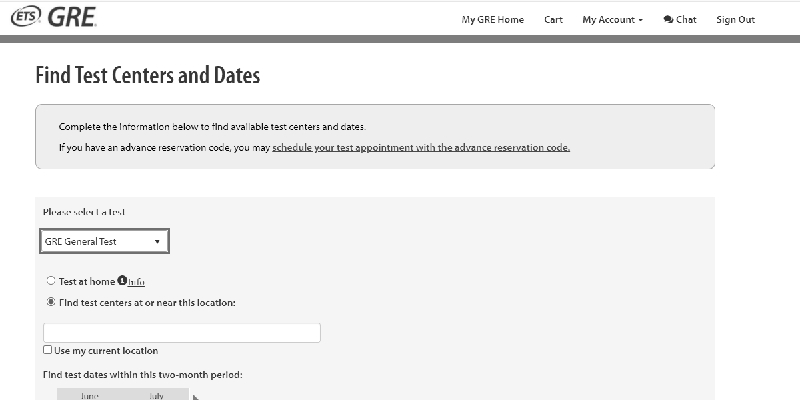
7. Select your test type from the drop-down box. Then you will see the option of test center and date. Choose as per your convenience. And register for your GRE exam.
Once the candidate has opted for his choice of Test Date and Exam Centre he would be redirected to the exam payment gateway page. Candidates would be required to pay the GRE test fee as mentioned. They should be careful to check the details of the examination here. Once the payment is made, changes made henceforth would incur a price.
Once the fee is paid, the candidates can take a printout of the acknowledgment receipt. They would also have access to the same on the dashboard of their accounts.
One can also do GRE registration by mail and phone. Details about it are given below:
Mail GRE Registration
Print and complete the Application Form, and send it to the address along with the appropriate fee. The form must be received at least three weeks before your preferred test date. The details concerned with a confirmation number, the test center address, and reporting time will be sent to you by mail.
Phone GRE Registration
Call the Regional Registration Center (RRC) for GRE registration. The call must be made at least 2 workings before your GRE test date. On the call itself, all the details regarding the confirmation number, reporting time, and the test center address will be provided to you.
If you have completed your registration look at the list of books that will help you crack the GRE exam easily: GRE Preparation Books and other Materials
GRE Registration for Subject Test
GRE Subject Tests are only taken with paper and pencil and are conducted 3 times per year. You can’t take Subject Tests on the computer so, the availability of test centers is limited, and registration is open only at specific times of the year.
For GRE registration of a Subject Test, go to your My GRE homepage and select the option “Register for a Subject Test”. After confirming your personal details, you’ll be able to check if there is any registration available currently. If it is available then you will have to select the subject test you are interested in. You can then find an available seat by either searching the best test center or searching by test date. Then follow the steps similar to the general GRE Registration.
The following guides will make your GRE preparation easy
How to improve GRE vocabulary?
Time management of 3 Hours 45 Minutes in the GRE
Best Countries to Study Abroad


Reach Out To Us
Register here to get newsletters for the latest study abroad news & free counselling assistance.